Table of Contents
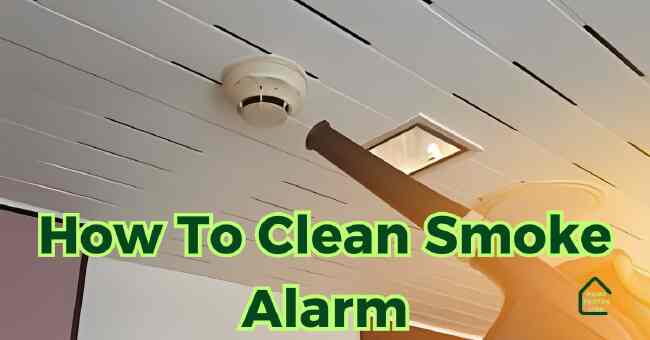
are you wondering how to clean smoke alarm? You should clean your smoke alarms a minimum of every 6 months. I learned this the hard way after a small kitchen fire while cooking almost turned into tragedy.
With smoke filling the room, we waited anxiously for the smoke alarm to sound so we could safely evacuate. But unknown to us, years of dust, dirt and debris had reduced the alarm’s sensitivity.
It failed to detect the smoke right away and activate. Fortunately we were able to put out the fire before major damage. But it reminded me how critical regularly maintained smoke alarms are for home safety.
In this post, I promise to clearly explain the recommended cleaning schedule for smoke alarms and steps ensure they function properly when lives count on it.
Here we go.
Why It’s So Important to Clean Smoke Alarms Regularly
Smoke alarms that aren’t cleaned routinely can develop issues over time that impact their performance, including:
- Dust buildup: Fine particles in the air settle on sensors, reducing sensitivity to smoke. This delays alarm trigger times.
- Grease accumulation: Kitchen grease and cooking residues getting sucked into vents sticks on sensors. This increases false alarm likelihood.
- Spider webs/nests: Webs or bug nests around openings block smoke from properly entering alarms.
By cleaning smoke alarms every 6 months, you prevent these problems and keep alarms working optimally. It takes just 10-15 minutes per alarm for basic maintenance that goes a long way.
Warning Signs Your Smoke Alarm Needs Cleaning
Be on the lookout for the following smoke alarm issues, signaling it’s time for cleaning:
- Frequent false alarms when cooking or showering
- Chirping sound when no smoke present
- Delayed alarm activation during smoke tests
- Flashing light indicating low sensitivity
Don’t ignore these warning signs. Address with a thorough cleaning right away before a fire emergency occurs.
What You Need To Clean Smoke Alarms
Cleaning smoke alarms is an easy DIY task. Before getting started, assemble the following recommended supplies:
| Cleaning Tool | Purpose |
|---|---|
| Microfiber cloth | Wiping down exterior dust and debris |
| Small soft brush | Loosening caked-on dirt around vents |
| Compressed air duster | Blasting away interior dust bunnies |
| Vacuum hose nozzle | Sucking up dirt/spiderwebs around openings |
Other handy items include flashlight, small screwdriver, fresh batteries, ladder/step stool for hard-to-reach spots, and replacement smoke alarms in case current ones are too old.
Step-By-Step Guide: How To Clean Smoke Alarm Covers and Vents
Let’s dive into the step-by-step process for effectively cleaning smoke alarm exteriors:
1. Check Smoke Alarm Age
First, inspect the date of manufacture printed on back of smoke alarm. The unit should be replaced if over 10 years old per National Fire Protection Association guidelines, even if still functioning.
2. Use a Microfiber Cloth To Wipe Down the Casing
Lightly run a microfiber cloth over the smoke alarm’s plastic casing to wipe away surface-level dust and debris. Take care around wiring if hardwired alarm.
3. Loosen Caked-On Grime with a Small Brush
For more stubborn buildup around openings, use a soft small brush to gently pry and loosen the material so it can be removed.
4. Vacuum All Vents/Openings Thoroughly
Place vacuum hose nozzle around vents and openings. Turn onto low setting and slowly vacuum entire area to extract loosened dirt.
5. Use Compressed Air To Blast Interior Components
Tilt smoke alarm at angle. Insert thin air duster nozzle into side/bottom vents. Blast 2-3 second spurts while rotating can to blow away interior dust.
6. Resecure Properly on Ceiling/Wall
Remount freshly cleaned smoke alarm securely in proper location. Test alarm and replace batteries if needed.
By regularly cleaning the outer vents and casing, you prevent excessive dirt entering interior sensors where it’s tougher to remove.
When To Consider Deep Cleaning a Smoke Alarm’s Internal Components
For smoke alarms that are still functioning but plagued by sensitivity issues, you may need to do a more thorough deep cleaning.
Symptoms include:
- Significant delay triggering alarm during smoke tests
- Constant low battery chirps when the battery replaced
- Frequent false alarms even after exterior cleaning
This indicates lots of stuck-on debris has accumulated internally on sensors, likely requiring disassembly to properly clean.
Consider deep cleaning smoke alarm internals if experiencing sensitivity problems combined with:
- 5+ years since the last internal cleaning
- Location in greasy kitchen
- A dusty environment like a workshop
Step-By-Step: Deep Cleaning a Smoke Alarm’s Internal Components
Deep cleaning the interior components of a smoke alarm improves functionality but must be done carefully given delicateness.
Follow these steps:
1. Turn Off Power and Disable Batteries
Shut off electricity via circuit breaker if hardwired alarm. Remove batteries if battery-powered unit.
2. Carefully Unscrew Casing for Internal Access
With power disabled, unscrew screws or pry casing apart via manufacturer instructions to access internals. Use a gentle approach. Sensors are fragile.
3. Use Air Duster From Multiple Angles
Tilt smoke alarm opening in various directions. Short burst air duster into crevices around internal sensor plate and wiring connectors to dislodge debris.
4. Inspect and Clean Battery Terminal
Check the battery terminal for corrosion or dirt buildup. Scrub with small terminal brush or vinegar-dipped Q-tip if needed.
5. Reassemble Properly
Double check casing gasket seal before reassembling so no gaps occur. Securely tighten all screws.
6. Complete Functionality Testing
With fresh batteries inserted, press test button and trigger smoke tester. Confirm properly sounding alarm at expected thresholds.
While involved, deep cleaning smoke alarm internals clears out even stubborn residue improving performance. Consider replacing unit altogether if component damage visible during inspection.
Changing Smoke Detector Batteries
Another key maintenance task for smoke alarms is replacing depleted batteries. Follow safety battery replacement tips:
- Check battery date codes and swap sealed units every year
- Never mix old and new batteries together
- Only use manufacturer-recommended batteries
- Securely snap batteries into place
It’s smart to replace batteries when adjusting clocks for daylight savings each March and November. Just remember “Change smoke alarm batteries when you change the time”.
Properly Positioning Smoke Alarms in Your Home
In addition to regular cleaning, correctly positioning smoke alarms ensures optimal performance. Use these expert placement tips in home installations:
- Install alarms on every floor, in every bedroom, and common area
- Place on the center of the ceiling at least 4 inches away from walls/corners
- In rooms with sloped ceilings, install 3 feet from the highest point
- Avoid installing within 5 feet of bathrooms/kitchens (to prevent false alarms)
Correct placement combined with routine cleaning gives robust smoke detection across every living space for maximum fire safety.
FAQs
Do Smoke Alarms Need Cleaning?
Yes, periodic cleaning is essential for smoke alarms to operate at peak performance. Over time, dust accumulation on smoke alarm sensors can impair sensitivity, delaying or preventing smoke detection. Other debris can cause false alarms.
Regular external cleanings every 6 months prevents buildup. For older units, deep internal component cleaning clears stubborn residue. Consistently maintained smoke alarms provide early warning to occupant safety threats.
How Do You Clean A Wired Fire Alarm?
Use a microfiber cloth to gently wipe down exterior plastic casing and cover debris around wiring penetrations into mounting box. Vacuum vents using brush nozzle attachment to dislodge grime and extract.
Avoid excessive moisture. For interior cleaning, disable power at circuit breaker before unscrewing alarm. Carefully blast internal sensor plate with short compressed air spurts before reassembling securely. Complete functionality test to verify placements still meets safety codes.
How Often Should Smoke Alarms Be Cleaned?
The National Fire Protection Association (NFPA) recommends cleaning smoke alarms a minimum of once every 6 months.
More frequent quarterly or monthly cleanings may be warranted for smoke alarms in kitchens, workshops, or other locations prone to quicker dirt accumulation.
It’s also wise to clean smoke alarms when performing seasonal fall and spring household cleaning routines. Consistently cleaning smoke alarms prevents dirt buildup that can reduce performance.
What Is The Best Way To Clean Smoke Damage?
For light surface smoke damage and odors on walls or fabrics, wipe down with white vinegar diluted in water. For porous materials like carpeting that absorbed smoke, use extraction cleaning with truckmount unit and deodorizing agents. Ozone shock treatments also help with lingering smells from fire damage.
In extreme smoke damage cases, replacement of severely impacted drywall or soft furnishings may be required. Work with certified smoke remediation specialists for health safety and proper cleaning protocols.
How Do I Know If My Smoke Detector Is Bad?
Warning signs to replace defective smoke detectors instead of attempting repair include units older than 10 years old, no sound when pressing test button, inability to power on, no alarm activation during smoke testing, constant low battery chirps despite new batteries, or physical damage like frayed wiring or cracked casing.
Also replace any recalled, expired, or improperly functioning smoke alarms no longer meeting safety standards. Install updated UL 217 and UL 268 certified units.
How Often Should Smoke Alarms Be Cleaned And Tested?
Smoke alarms should be cleaned a minimum of twice per year, but can be tested more frequently. The NFPA recommends testing units at least monthly to verify batteries and alarm sound functionality by pressing test button.
Smoke alarms connected to monitored systems can be automatically tested weekly. Clean smoke alarms when changing clocks daylight savings in spring and fall as easy reminder.
Why Is Smoke Alarm Beeping Without Smoke?
Common reasons for false beeping without smoke include low backup battery, sensor malfunctions, accumulation of dust/grease triggering card faults, installation too close to bathrooms/kitchens, damaged wiring causing interference, exceeding 10 year product life, high humidity and cold weather.
Try cleaning unit, replacing battery, relocating further from moisture/steam sources and ambient disruptions. If issue persists, replace smoke detector.
What Are The 3 Types Of Smoke Detectors?
The main types of smoke detectors include ionization detectors optimal for flaming fires, photoelectric detectors responding better to smoldering fires, and combination or dual-sensor models with both ionization and photoelectric technology in one.
There are also heat detectors, project beam types detecting obstruction between emitter/receiver, air aspiration systems using pipes drawing air to centralized sensor, and advanced video detection with smoke pattern recognition algorithms.
Do Smoke Detectors Expire?
Yes. The U.S. National Fire Alarm and Signaling Code requires all smoke alarms be replaced after 10 years from date of manufacture. Expired smoke detectors, even still ‘working’ lose sensitivity and reliability over time.
Always check smoke alarm date stamps and install UL 217 listed replacements per local codes when outdated alarms are found to protect safety. Some states require homeowners disclose outdated smoke alarms upon selling properties.
Why Do Smoke Detectors Beep Every 5 Minutes?
If a smoke detector is emitting a short beep or chirp sound approximately every 5 minutes, this often signals a depleted backup battery needing replacement.
While units may still technically function for smoke detection when plugged into AC power, the low battery indication implies their backup function during power outage would be at risk in an actual fire emergency.
Follow your smoke detector user manual for proper battery installation and replacement procedures to clear the low battery alerts.
How Do You Clean Smoke Off Metal?
For stubborn smoke residue stains on metal surfaces, use a multi-step cleaning process. First wipe down with diluted vinegar solution to help dissolve grime followed by a baking soda made into thick paste rubbed carefully over affected areas.
Rinse and dry before applying metal polishing paste working into stains with soft brush. Buff off polishing residue with soft towel.
Avoid abrasive scouring pads that may scratch finishes. In severe cases, repainting metal may better hide damaged look from smoke than cleaning alone.
Conclusion: Consistent Smoke Alarm Care Saves Lives
Although a simple device, smoke alarms are crucial lifesavers in building/home fire emergencies when maintained properly. Staying consistent with the cleaning guidance provided gives your smoke detectors the best chance of activating in time to get out safely.
So be sure to conduct a thorough external vent and casing cleaning every 6 months using microfiber, brush, and vacuum.
Additionally, evaluate internal component deep cleaning needs for alarms over 5 years old or with sensitivity problems. Replacing low batteries annually also optimizes alarm availability when you need it most.
By caring for your smoke alarms properly, you take major steps towards responsibly preventing fire tragedies for both families and businesses.
Protect those facilities and lives most precious to you with preventative maintenance. Stay safe out there.


Pingback: Do Smoke Alarms Detect Carbon Monoxide? Get the Facts on Smoke & CO Detection - homeprotexlink